Operation Manual
Welcome
Congratulations, you are now the proud owner of your very own Lifeclo.cc.
May you spend the rest of your finite time wisely.
Try not to spend too much time ogling at how wondrous Lifeclo.cc is.
Layout
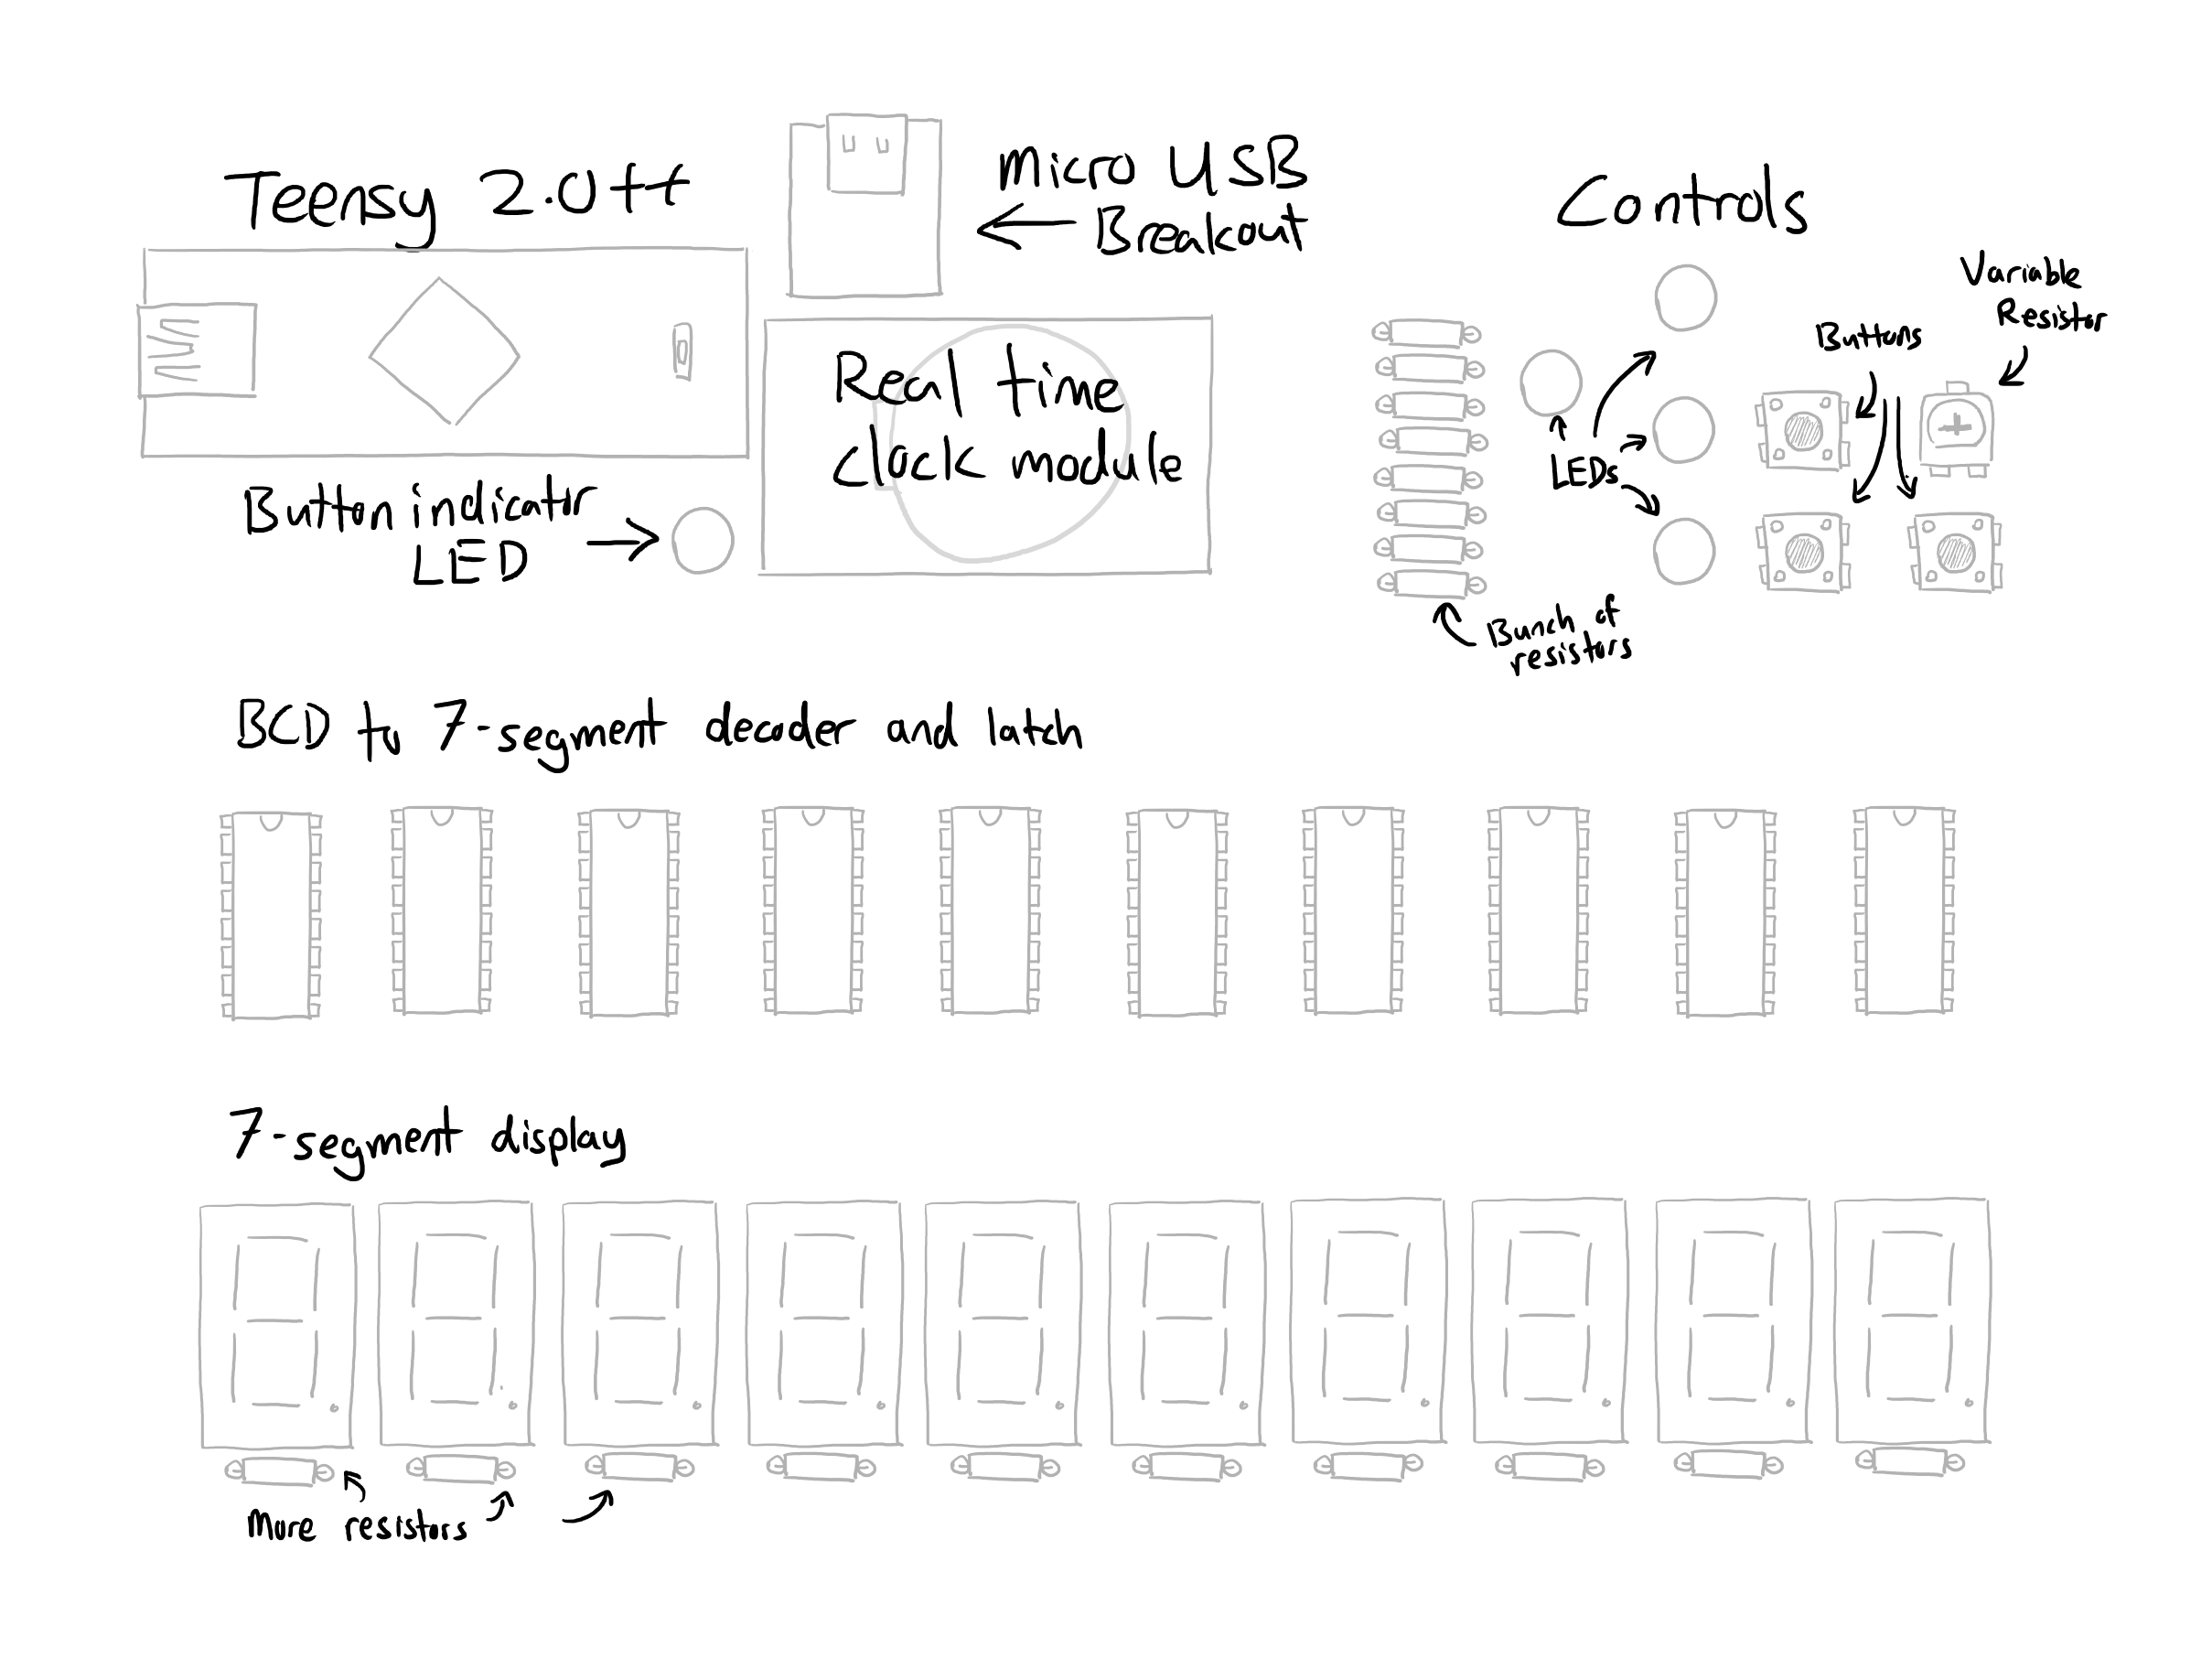
This is roughly what Lifeclo.cc looks like. (colours may vary)

Part Breakdown

Basic Operation
Controls
There are three buttons and four indicator LEDs.
These are what you will use to control the clock and to know which mode you are currently on.


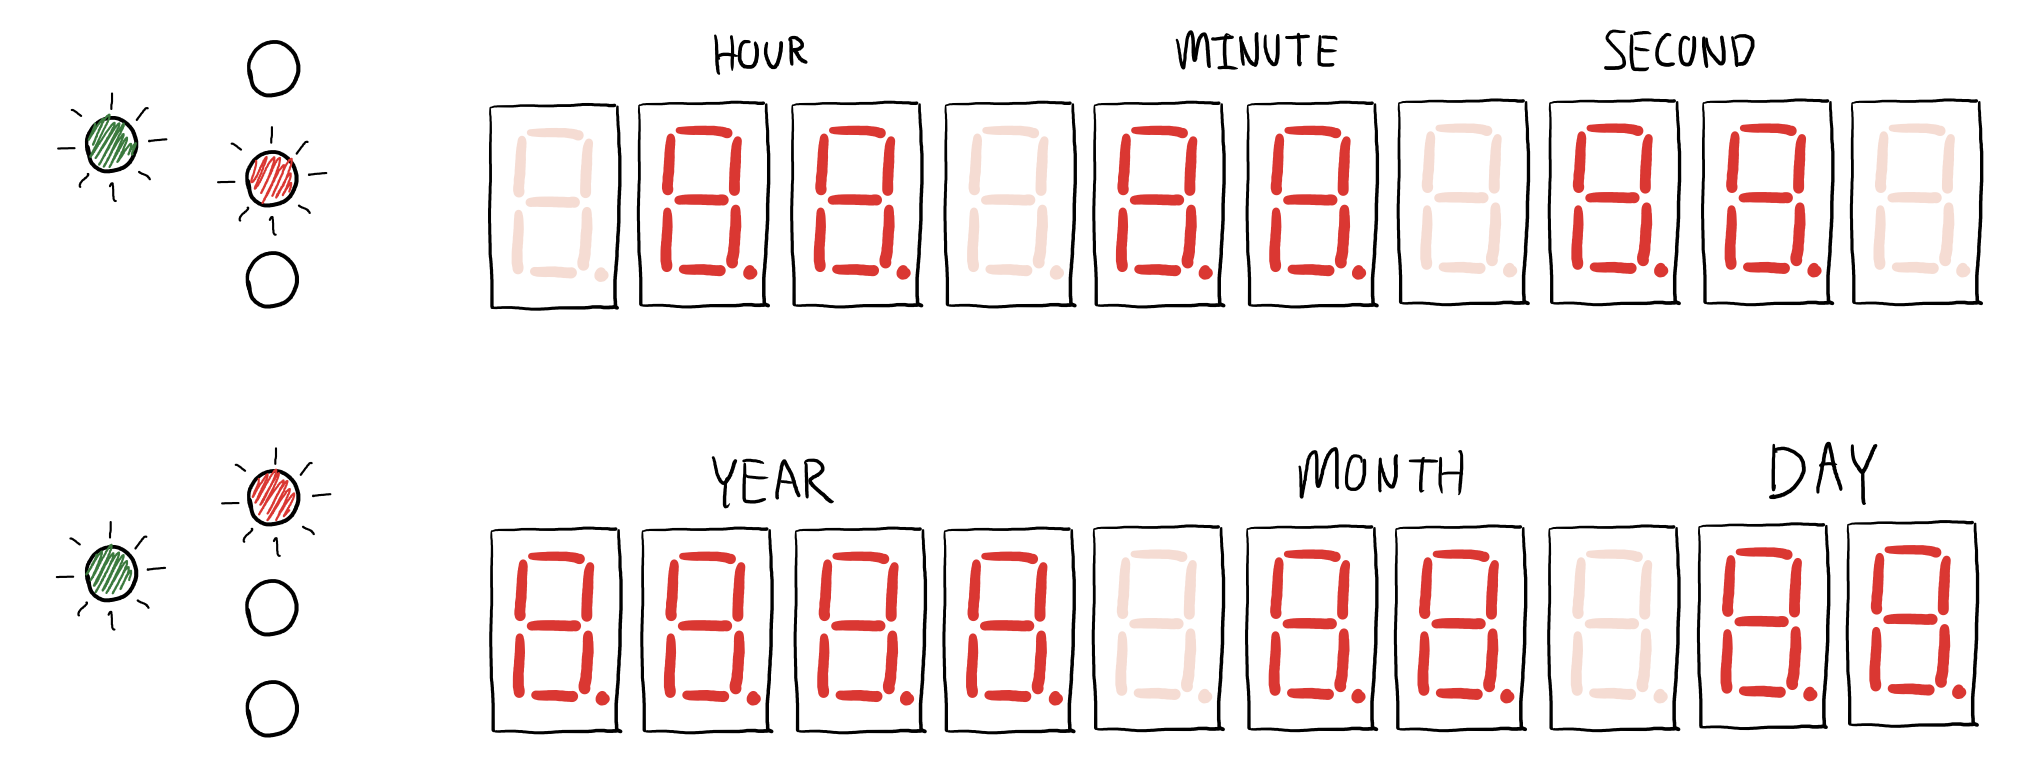
Checking the Time
Press the TIME/UP button. Pressing it again will go back to countdown mode, or it will go back after 5 seconds.

Checking the Date
Press the DATE/DOWN button. Pressing it again will go back to countdown mode, or it will go back after 5 seconds.

Changing the brightness

Turn the brightness knob clockwise to increase brightness, turn it anti clockwise to decrease the brightness.
Settings
Setting the date & time
Press and hold the SET button to go into set mode.
The SET MODE LED will light up.
The display will show the date, and one of the numbers will blink. This indicates the selected number.
Press the UP / DOWN buttons to increase or decrease the value of the number.
Press the SET button to go to the next number.
The clock will cycle through the different date/time components in this order:
YEAR > MONTH > DAY > HOUR > MINUTE > SECOND

Setting your birthday
Press and hold the UP button to go into birthday set mode.
The SET MODE & BDAY LED will light up.
Setting the birthday is the same as setting the date & time, but you will only have to set the date.
Pressing the SET button will cycle through the date components in this order:
YEAR > MONTH > DAY

Power
Lifeclocc requires an external power source, it is not battery powered. It can be powered by either Micro USB (from the top) or Mini USB (on the top left)
If you want to show it off to everyone, you will need a power bank (but it won’t last more than a few days).
It has a clock unit that has a CR2032 battery which can last a few years. This is similar to the battery in your computer that helps keep time in the event of a power loss. If that happens and the battery runs out, all you have to do is to replace the battery and set the time again. Similar to losing power on your watch, for instance.

Mounting
Desk Mount
The desk mount is one of the options that can come with your purchase.
It's a simple 3D printed stand that comes in two parts. The base, and the support.
The base has 4 holes that you can insert the supports into. Choosing different holes will allow you to tilt the lifeclocc at different angles.
Wall Mount
The wall mount is one of the options that can come with your purchase.
It's a brace that gives you a surface to stick to a wall. It is recommended that you use something like 3M command tape to mount it onto the wall.
To insert
Slide the bottom of lifeclocc in first. Then snap the top into the brace. You might have to use a bit of force to snap the brace in place.
To remove
Remove the top of the brace by snapping the PCB out. Then slide the lifeclocc up and out of the brace.
Other Ideas
These mounting solutions are admittedly not very well thought out. It was more of a nice to have that I designed since I happened to have a 3D printer lying around. You can find the 3D models in the source directory of this site.
- You can hang it like a picture using the hole punches in the corners.
- You could hot glue it to the wall.
- You could use blue tack to prop it up.
- You could leave it on the floor.
Usage
Conversational piece
People are going to ask about it. This is a great time to segue your conversation into human mortality.
Motivational piece
Ever been stuck watching TV for hours on end? Just stick this on the top of your TV and see your seconds tick by. Remember you only have that many seconds left to do something with life.
Existential pondering
“Why do we even exist?” “What is the meaning of everything?” “2 billion seconds is so little compared to the age of civilisations or the planet” are good places to start.
Advanced Usage
Lifeclo.cc is teensy powered, meaning you can reprogram it to do whatever you want. Go to lifeclo.cc/source/v1/ for the source code and instructions on how to reprogram it.
Frequently Asked Questions
How does it know how much time I have left?
What happens when I reach 80 years old?
If you do manage to keep this till you’re 80, you’ve won!